Category: Beauty

  • Managing Reactive Skin

    Managing Reactive Skin

    I still remember the stinging sensation of my face feeling like it was on fire after a night of over-exfoliating with every trendy, high-percentage acid I could find. I was in my early twenties, convinced that if it didn’t burn, it wasn’t working, and I ended up completely wrecking my moisture barrier. That painful lesson in skin sensitivity taught me that more isn’t always better; sometimes, more is just more irritation. I spent months hiding behind heavy concealers, feeling totally disconnected from my own reflection because I was so focused on “fixing” things that I was actually breaking them.

    I’m not here to sell you a twelve-step ritual or a collection of overpriced, fragranced serums that promise miracles but deliver redness. Instead, I want to share what I’ve learned about stripping things back to the essentials that actually soothe and protect. We’re going to cut through the marketing noise and focus on a minimalist approach that respects your skin’s natural rhythm. My goal is to help you find that calm, steady ground again, so your routine feels like a moment of peace rather than another stressful chore on your to-do list.

    Table of Contents

    Identifying Skin Triggers to Quiet the Irritation
    Identifying Skin Triggers to Quiet the Irritation

    Before we can fix the problem, we have to figure out what’s actually causing the flare-ups. For me, it wasn’t just one thing; it was a slow build-up of too many acids and not enough rest. Identifying skin triggers is a bit like detective work, but I promise it’s worth the effort. Start by looking at your environment and your products. Is it the hard water in your shower? A new laundry detergent? Or maybe that “miracle” serum you bought last week? I’ve learned that even the most expensive products can be the culprit if they don’t play nice with your unique chemistry.

    Once you suspect a culprit, try a “process of elimination” approach. I like to temporarily strip my routine back to just the basics—a gentle cleanser and a simple balm—to see if the irritation subsides. This is where you can really see the fragrance-free moisturizer benefits in action, as it allows your skin to breathe without extra interference. If you notice that your face feels tight or looks blotchy after a specific step, you’ve likely found your answer. Pay close attention to how your skin reacts to temperature changes and even stress, as these are often the hidden culprits behind sudden redness.

    Redness and Inflammation Relief for a Peaceful Complexion
    Redness and Inflammation Relief for a Peaceful Complexion

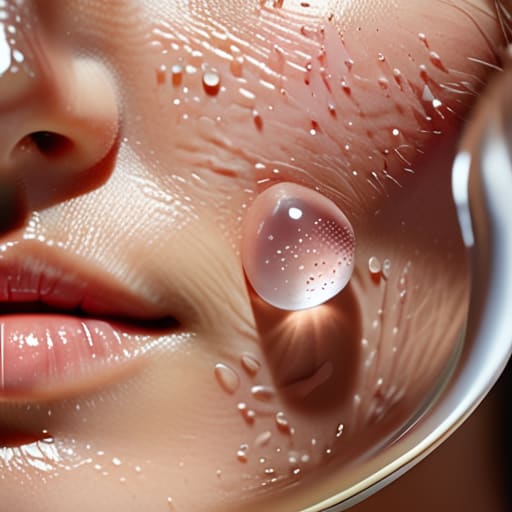
    Once you’ve figured out what’s setting your skin off, the next step is actually calming the storm. When my face feels hot or looks blotchy, I stop reaching for the high-strength acids and pivot entirely toward redness and inflammation relief. It’s about moving away from “correction” and moving toward “comfort.” I’ve learned the hard way that trying to treat redness with more active ingredients is like trying to put out a fire with gasoline. Instead, I look for dermatologist recommended soothing ingredients like centella asiatica, colloidal oatmeal, or panthenol. These aren’t just buzzwords; they are the gentle helpers that tell your skin it’s okay to relax.

    During these flare-ups, I lean heavily into a minimalist approach focused on damaged skin barrier repair. I swap my usual complex serums for a simple, fragrance-free moisturizer. There are so many fragrance-free moisturizer benefits to consider, but the biggest one for me is simply removing the irritation that synthetic scents often cause. It’s not about being boring; it’s about giving your complexion the quiet space it needs to heal itself without constant interruption.

    My Bare-Minimum Toolkit for Soothing Reactive Skin

    • Strip your routine back to the basics. When my barrier feels compromised, I ditch the fancy acids and high-strength retinols entirely. Just stick to a gentle cleanser, a basic moisturizer, and SPF until your skin stops feeling like it’s on fire.
    • Watch out for “fragrance” in everything. I used to think a floral scent meant a product was “natural,” but for sensitive skin, it’s often just a one-way ticket to redness. Look for labels that explicitly say fragrance-free, not just unscented.
    • Temperature matters more than you think. I’ve learned the hard way that splashing my face with hot water feels great in the moment, but it’s devastating for a reactive barrier. Stick to lukewarm water to keep the irritation at bay.
    • Stop the “product hopping” cycle. It’s tempting to try a new trending serum every week, but every time you introduce something new, you’re asking your skin to do a lot of heavy lifting. Introduce one new thing at a time and give it at least two weeks to settle.
    • Listen to your skin’s “quiet” signals. Irritation doesn’t always look like a bright red rash; sometimes it’s just a slight tightness or a weirdly shiny texture. If your skin feels “off,” treat it with extra kindness that day instead of pushing through with your usual actives.

    Finding Your Calm: The Bottom Line

    Stop the cycle of irritation by stripping your routine back to the basics; when your skin is acting up, less is always more.

    Learn to listen to your skin’s subtle cues rather than fighting through the discomfort with more harsh actives.

    Focus on repairing your barrier with soothing, science-backed ingredients instead of chasing the latest complicated skincare trend.

    ## Listening to What Your Skin is Actually Saying

    “We often treat skin sensitivity like an enemy to be conquered with more products, but I’ve learned it’s actually just your skin asking for a little more grace and a lot less noise.”

    Neha Rajagopal

    Finding Your Calm Again
    Finding Your Calm Again with skincare.

    At the end of the day, managing sensitive skin isn’t about finding a magic, expensive cure-all; it’s about listening to what your skin is actually telling you. We’ve talked about identifying those sneaky environmental triggers, stripping back your routine to the essentials, and using soothing ingredients to tackle redness when it flares up. It’s easy to get caught in a cycle of trying every new “miracle” product on the market, but I’ve learned the hard way that more is rarely better. The goal is to stop the guesswork and focus on building a stable, predictable foundation that respects your skin’s natural barrier.

    Please remember that your skin is a living organ, not a problem to be solved or a project to be perfected. There will be days when it feels reactive or just plain difficult, and that is perfectly okay. Instead of viewing a breakout or some redness as a failure, try to see it as a signal to slow down and embrace a simpler approach. Skincare should be a way to nurture yourself, a quiet moment of peace in an otherwise hectic morning. You deserve to feel comfortable and at ease in your own skin, one gentle step at a time.

    Frequently Asked Questions

    How can I tell if my skin is actually sensitive or if I've just damaged my skin barrier with too many actives?

    Honestly, I’ve been exactly where you are. If your skin feels tight, looks shiny but is still flaky, or stings when you apply even basic moisturizer, you’ve likely compromised your barrier. True sensitivity is often a lifelong trait, but barrier damage is a reaction to overdoing it. If your skin was fine until you introduced that new retinol or acid, it’s not “sensitive”—it’s just exhausted. Take a breath, pause the actives, and focus on healing.

    Are there specific ingredients I should look for in a moisturizer that won't trigger a flare-up?

    When you’re in the middle of a flare-up, I like to think of my moisturizer as a cozy blanket for my face. Look for “barrier-builders” like ceramides and fatty acids—they help patch up those tiny cracks in your skin. Hyaluronic acid and glycerin are also great for pulling in moisture without being heavy. Just avoid anything with heavy fragrances or essential oils; right now, your skin needs peace, not a botanical garden.

    Is it possible to maintain a functional routine if I have both sensitive skin and occasional breakouts?

    Honestly, it’s a total balancing act, but it is absolutely possible. I used to think I had to choose between soothing my redness or fighting a breakout, but that usually just ended in a compromised barrier. The trick is to focus on “gentle intervention.” Use calming, hydrating basics as your foundation, and then strategically spot-treat only the active breakouts with a targeted treatment. It keeps your routine functional without overworking your skin.
  • Using Various Facial Tools

    Using Various Facial Tools

    I remember sitting on my bathroom floor a few years ago, staring at a countertop cluttered with expensive, rose-gold gadgets that promised to “reconstruct” my face. I had spent my entire early twenties chasing every high-tech trend, only to end up with a compromised skin barrier and a very empty savings account. The beauty industry loves to convince us that we need a mountain of high-frequency wands and microcurrent devices to see results, but most of those facial tools are just expensive noise designed to trigger our FOMO. Honestly, if a tool feels like it requires a degree in electrical engineering just to use it during a busy Tuesday morning, it’s probably not worth your time.

    I’m not here to sell you on a lifestyle of complicated, multi-step rituals that leave you feeling more stressed than relaxed. Instead, I want to help you cut through the marketing fluff and figure out which tools actually earn their place on your vanity. My goal is to share a straightforward, science-backed guide to the only essentials that truly make a difference. We’re going to focus on what works for real, busy lives, so you can turn your skincare into a moment of peace rather than another chore on your to-do list.

    Table of Contents

    Beyond the Hype Real Skincare Device Benefits

    Beyond the Hype Real Skincare Device Benefits

    It’s easy to get swept up in the marketing for every new gadget that hits my Instagram feed, but I’ve learned to approach these things with a healthy dose of skepticism. After years of experimenting with everything under the sun, I’ve realized that the real skincare device benefits aren’t about magic transformations overnight. Instead, it’s about enhancing the products you already love. For example, using a tool to help your serums penetrate a little deeper or simply using a device to boost circulation can make a noticeable difference in how your skin looks and feels.

    I’ve found that the most effective tools are the ones that actually help you slow down. Whether you’re exploring microcurrent technology for skin to give your face a little lift or just using a simple tool for lymphatic drainage, the goal should be consistency, not complexity. I don’t need a high-tech lab on my vanity; I just need a few reliable pieces that help me de-puff and relax after a long day of staring at a laptop screen. If a gadget doesn’t fit into my quiet morning ritual, it probably doesn’t belong in my routine.

    Jade Roller vs Gua Sha Finding Your Calm

    Jade Roller vs Gua Sha Finding Your Calm

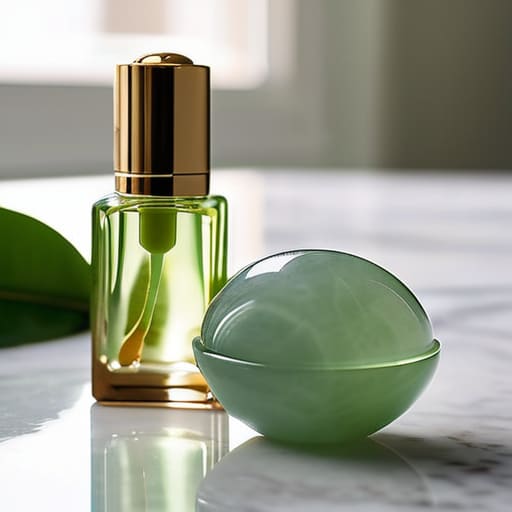
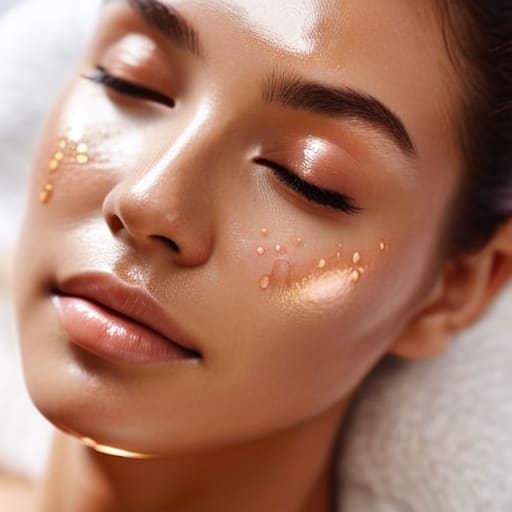
    If you’ve ever scrolled through social media, you’ve definitely seen these two stone beauties floating around. But when it comes to the actual jade roller vs gua sha debate, it really comes down to what kind of “calm” you’re looking for. I personally reach for my jade roller when I’m feeling particularly puffy or stressed; it’s cool to the touch and feels like a mini spa treatment in seconds. It’s perfect for a quick, soothing roll over your moisturizer to help with lymphatic drainage tools—basically just helping move that excess fluid along so you don’t look quite so tired.

    Gua sha, on the other hand, requires a bit more intention. It’s a flatter, more sculpted tool that demands you actually slow down. Instead of just rolling, you’re using these at-home facial massage techniques to gently hug the contours of your face. It’s a bit more of a workout for your muscles, but the way it helps release tension in the jawline is unmatched. For me, it’s less about a quick fix and more about that deep, meditative release at the end of a long workday.

    My Rules of Thumb for Using Facial Tools Without the Stress

    • Less is definitely more. You don’t need to spend thirty minutes massaging your face every night; even a quick, two-minute session while your Lo-Fi playlist is winding down can make a world of difference.
    • Listen to your skin, not the trends. If your skin barrier feels a bit sensitive or reactive, put the tools away. There is no point in forcing a massage when your skin is asking for a break.
    • Cleanliness is everything. I learned this the hard way—always wash your tools with a gentle cleanser after every single use. You don’t want to be pressing old bacteria back into your pores.
    • Always work with your natural flow. Use light, upward, and outward strokes. The goal is to encourage gentle lymphatic drainage and relaxation, not to tug or pull at your skin.
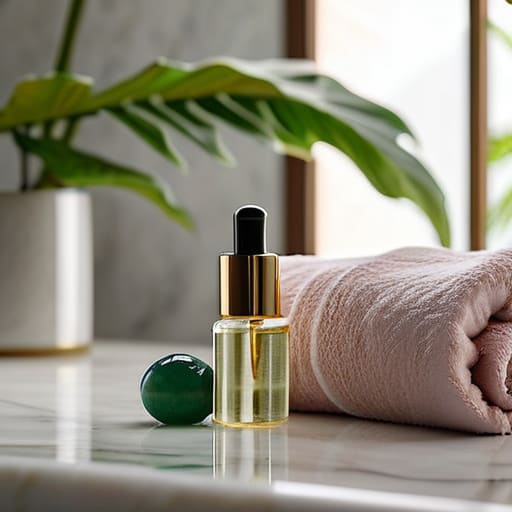
    • Pair your tools with products you love. Using a tool on bone-dry skin can cause unnecessary friction. Instead, use it while your favorite facial oil or a soothing serum is still damp on your skin.

    My Final Thoughts on Finding Your Flow

    Don’t let the gadgets overwhelm you; pick one tool that feels good in your hands and stick to it.

    Consistency beats intensity every single time—five minutes of gentle massage is better than a rushed, aggressive session once a week.

    Listen to your skin’s cues, because the goal is to find a moment of calm, not to add more stress to your morning.

    The Truth About Tools

    “I’ve learned that a facial tool isn’t a magic wand that fixes everything overnight; it’s just a way to slow down, breathe, and actually feel the product working into your skin.”

    Neha Rajagopal

    Finding Your Flow

    Skincare ritual for Finding Your Flow.

    At the end of the day, whether you choose the cooling sensation of a jade roller or the targeted sculpting of a gua sha, the goal remains the same: intentionality. We’ve looked at how these tools can help with lymphatic drainage and soothing inflammation, but the real magic isn’t in the tool itself—it’s in the consistency of the ritual. You don’t need a drawer full of expensive, high-tech gadgets to see a difference in your skin. Instead, focus on choosing one or two reliable pieces that actually fit into your morning or evening flow without feeling like another item on your to-do list.

    I spent so many years chasing the “next big thing” in skincare, only to end up more stressed and with a compromised barrier. If there is one thing I want you to take away from this, it’s that your skincare should be a sanctuary, not a source of pressure. Let these tools be a way to check in with yourself, to breathe, and to quiet the noise of a busy day. Whether you’re five minutes or twenty minutes into your routine, make sure it feels like a moment of peace that you truly deserve.

    Frequently Asked Questions

    Do I actually need to use these tools every single day, or is that overkill for my skin?

    Honestly? Using them every single day is usually overkill. After I wrecked my barrier in my early twenties, I learned that more isn’t always better. If you’re using a Gua Sha, two or three times a week is plenty to see results without overworking your face. Think of these tools as a treat, not a chore. If your skin feels sensitive or tired, just skip it. Consistency matters, but so does listening to your skin.

    How do I know if a specific tool is going to irritate my skin barrier rather than help it?

    Honestly, the best way to know is to listen to your skin—it’s much smarter than the marketing hype. If you feel any stinging, redness, or even a slight “hot” sensation while using a tool, stop immediately. That’s your barrier telling you it’s being overstimulated. I always start with very light, sweeping motions and use a generous amount of facial oil to ensure there’s zero friction. If your skin feels sensitive the next morning, that tool is a no-go for now.

    Are these tools worth the investment, or can I get similar results with just my hands and a good moisturizer?

    Honestly? If you’re on a budget, your hands are more than enough to get the job done. There is a beautiful, tactile way to massage your moisturizer in that feels incredibly grounding. But, if you find yourself craving that extra bit of lymphatic drainage or a cooling sensation to wake you up, a tool adds a layer of intentionality. It’s not about the “must-have” gadget; it’s about whatever makes the ritual feel special for you.

  • Wearing Sunscreen Under Makeup

    Wearing Sunscreen Under Makeup

    I still remember the morning I finally hit my breaking point, staring into the bathroom mirror at a face that felt tight, angry, and completely raw from way too many harsh actives. I was trying so hard to do “everything right,” but I ended up just making my skin’s life miserable. One of the biggest stressors during that time was trying to figure out the “correct” way to layer sunscreen and makeup without it turning into a greasy, pilling disaster. Honestly, the beauty industry loves to make us feel like we need a complex, ten-step ritual just to protect our skin and look decent, but that’s just exhausting.

    I’m not here to sell you on a fifteen-step layering process or a luxury serum that costs more than my monthly grocery bill. Instead, I want to share the simple, realistic ways I manage my routine so it actually feels like a moment of peace rather than a chore. We’re going to talk about how to layer sunscreen and makeup effectively, focusing on products that actually work for a busy life. No gatekeeping, no unnecessary hype—just straightforward advice to help you protect your skin without the stress.

    Table of Contents

    Mineral vs Chemical Sunscreen Under Makeup Simplifying Your Choice

    Mineral vs Chemical Sunscreen Under Makeup Simplifying Your Choice

    This is where most of us get stuck, right? You’re standing in front of the mirror, staring at two different tubes, wondering which one won’t turn your face into a patchy mess. If you’re looking for the easiest route, chemical sunscreens are usually the winner for wearing under foundation. They tend to absorb into the skin more seamlessly, which is a lifesaver if you’re worried about preventing makeup pilling with SPF. Since they don’t sit on top of the skin like a physical shield, they leave a much smoother canvas for your base products.

    On the other hand, if you have super sensitive skin—or if you’ve been through the “ruined barrier” phase like I have—mineral sunscreens are your best friend. They use zinc or titanium to reflect UV rays, which is much gentler on reactive skin. The catch? They can sometimes leave a white cast or a slightly heavier texture. My trick for finding the best balance is to look for a tinted mineral option; it helps bridge the gap between protection and a natural finish. Ultimately, the “best” one is simply the one you’ll actually remember to wear every single morning.

    The Best Way to Apply Foundation Over Sunscreen

    The Best Way to Apply Foundation Over Sunscreen

    The biggest mistake I see people making is rushing this process. If you try to layer your foundation immediately after your SPF, you’re almost guaranteed to end up with a patchy mess. The secret to preventing makeup pilling with SPF is simply patience. I’ve learned the hard way that you need to give your sunscreen at least three to five minutes to fully “set” and form that protective film on your skin. If you can, use this time to grab your coffee or tend to your herbs; just don’t start blending your base until the sunscreen feels dry to the touch.

    When you’re finally ready to apply your coverage, less is more. I highly recommend using a damp beauty sponge or even your fingertips rather than a dense buffing brush. Brushes can sometimes micro-exfoliate the skin, lifting up the sunscreen layer underneath and creating those annoying little clumps. By gently tapping the foundation on, you preserve the integrity of your sun protection while achieving a much more natural, skin-like finish. It’s all about that gentle touch.

    My Little Cheat Sheet for a Stress-Free Morning

    • Let your sunscreen actually set. I know it’s tempting to rush straight to foundation so you can get out the door, but give your SPF at least three to five minutes to dry down. If you apply makeup while it’s still tacky, you’ll just end up with a patchy mess.
    • Ditch the heavy brushes for a bit. If you find your foundation is sliding around or lifting your sunscreen, try using a damp beauty sponge to bounce your makeup on instead of rubbing it. It’s much gentler on that protective layer you just applied.
    • Don’t forget the reapplication struggle. We all know it’s hard to layer makeup over SPF mid-day, so I’ve become a huge fan of translucent SPF powders or setting sprays with sun protection. It’s the easiest way to refresh without ruining your look.
    • Keep your makeup tools clean. Since we’re layering products, those brushes can become a playground for bacteria. A quick wash once a week keeps your skin clear and prevents those random breakouts that happen when your routine gets too heavy.
    • Prioritize the “base” layer. If you’re running low on time, remember that your sunscreen is the non-negotiable part. If you have to skip the concealer or the extra bronzer, do it. The protection matters way more than the coverage.

    The Bottom Line: Keeping it Simple

    Don’t let the fear of pilling stop you—just give your sunscreen a few minutes to set before you touch your face with foundation.

    Focus on your protection first; if you have to choose between a perfect makeup finish and a solid layer of SPF, always choose the SPF.

    You don’t need a specialized “makeup primer” that doubles as sunscreen; a reliable, single-purpose SPF is often much kinder to your skin barrier.

    The Golden Rule of Layering

    “Think of your sunscreen as the foundation of your skin’s health, not an obstacle to your makeup. If you treat it as a protective layer rather than a heavy barrier, you’ll find that your products sit much better and your skin feels much more at peace.”

    Neha Rajagopal

    Finding Your Flow

    Finding Your Flow with SPF and makeup.

    At the end of the day, getting your sunscreen and makeup to play nice doesn’t have to be a science experiment. Whether you decide to stick with a mineral formula to avoid that greasy feeling or opt for a chemical one that sinks in quickly, the most important thing is that you actually do it. Remember to let your SPF settle for a few minutes before reaching for your foundation, and don’t be afraid to use a damp sponge to layer your products if you’re worried about pilling. It’s all about finding that sweet spot where protection meets your personal style without adding unnecessary stress to your morning.

    I know how easy it is to get caught up in the endless cycle of new products and complex techniques, but I promise you, your skin doesn’t need perfection. It just needs consistency and a little bit of kindness. Skincare should be a way to ground yourself, not another item on a frantic to-do list. So, take a deep breath, put on your favorite playlist, and just focus on showing up for yourself. You’ve got this, and your skin will feel the difference when you finally stop overcomplicating the process and just start enjoying it.

    Frequently Asked Questions

    Does applying foundation actually rub off my sunscreen protection?

    It’s a valid fear, and honestly, I used to stress about this all the time. The short answer? If you’re applying your foundation with a heavy hand or vigorous buffing motions, you can disturb that protective layer. To keep things easy, I recommend letting your SPF set for a few minutes until it feels tacky, then gently patting your foundation on with a damp sponge. Patting, not rubbing, is the secret to keeping your protection intact.

    Can I use a tinted moisturizer as my sunscreen to save time in the morning?

    Honestly? Yes, but with a massive catch. If you’re running late and a tinted moisturizer is all you’ve got, use it—it’s better than nothing. But don’t rely on it as your only layer of protection. Most people don’t apply nearly enough tinted product to actually hit that SPF rating on the bottle. My advice? Stick to a dedicated sunscreen first, then layer the tinted moisturizer on top. It keeps your protection reliable without adding stress.

    How do I deal with my sunscreen pilling or balling up once I put my makeup on?

    Ugh, the dreaded pilling. I’ve been there, and it is so frustrating when you’re just trying to get out the door. Usually, it’s a clash of textures. If your sunscreen is silicone-based and your foundation is water-based, they’ll fight every time. Try waiting a full five minutes for your SPF to actually set before touching it with makeup. Also, less is more—don’t layer too many heavy creams before your base. Keep it simple.

  • Stop the Guesswork and the Wasted Money: a Calm, Simple Guide on How to Choose the Right Foundation Shade.

    Stop the Guesswork and the Wasted Money: a Calm, Simple Guide on How to Choose the Right Foundation Shade.

    I still remember standing in a brightly lit department store bathroom three years ago, staring at my reflection and feeling completely defeated. I had just swiped five different testers across my jawline, and somehow, every single one of them made me look either like a ghost or a literal orange. It was one of those moments where the sheer complexity of beauty marketing felt so exhausting. We’re constantly told we need high-tech scanning tools or a dozen different swatches to get it right, but honestly, learning how to choose the right foundation shade shouldn’t feel like a math exam.

    I’m not here to sell you on a fancy new gadget or a twenty-step color-matching ritual. Instead, I want to share the simple, grounded approach I use to find my match without the stress. I’ll walk you through how to identify your undertones and where to actually test products so they melt into your skin rather than sitting on top of it. Let’s cut through the marketing noise and find your perfect match with a bit of common sense and a lot less overwhelm.

    Decoding Your Canvas Understanding Skin Undertones

    Decoding Your Canvas Understanding Skin Undertones.

    Before we even talk about product textures or coverage, we have to talk about the “hidden” layer: your undertone. I used to make the mistake of only looking at how light or dark my skin was, which is why I’d often end up with a foundation that looked like a mask. Understanding skin undertones is the real secret to making a product look like actual skin rather than makeup. Think of your surface tone (fair, medium, deep) as the canvas, but your undertone is the actual color temperature living underneath it.

    So, how do you figure out if you’re leaning towards warm vs cool vs neutral undertones? A quick trick I swear by is looking at the veins on your wrist in natural light. If they look greenish, you’re likely warm; if they’re blue or purple, you’re cool. If you can’t quite tell, you probably fall into that lovely, flexible neutral category. Don’t overthink it too much, though—it’s more about finding a balance that doesn’t make you look unexpectedly ashy or overly orange by midday.

    Warm vs Cool vs Neutral Undertones Explained

    Think of your undertone as the permanent color beneath your skin’s surface—it’s the “soul” of your complexion that doesn’t change, even if you get a tan. If you notice your skin has hints of golden, yellow, or peachy hues, you likely fall into the warm category. People with warm undertones often find that gold jewelry looks more harmonious against their skin. On the flip side, if you lean toward pink, red, or even bluish tones, you’re most likely cool. For those of us who feel like we sit right in the middle—perhaps looking equally good in silver and gold—you’re part of the beautiful neutral camp.

    Understanding skin undertones is the real secret to avoiding that dreaded “mask” look where your face doesn’t quite match your body. If you’re struggling with warm vs cool vs neutral undertones, try looking at the veins on your wrist in natural light. Greenish veins usually signal warmth, while blue or purple ones point toward cool tones. It’s a simple, low-stress way to narrow down your options before you even touch a bottle.

    My Real-World Rules for Finding "The One"

    • Skip the wrist test. I know everyone says to check your veins, but your wrist skin can be weirdly different from your face. Instead, swatch the foundation along your jawline—it’s the bridge between your face and neck, and it’s the only way to see if the color actually disappears into your skin.
    • Natural light is your best friend (and your harshest critic). I’ve made the mistake of buying a shade that looked perfect under the warm glow of a drugstore aisle, only to step outside and realize I looked like I was wearing a mask. Always, always take a hand mirror to a window before you commit.
    • Don’t fear the oxidation. Some foundations look great the second you blend them in, but then they sit on your skin for twenty minutes and turn a shade darker or more orange. Give your swatch a little time to “settle” and breathe before you decide it’s a winner.
    • Less is more when testing. You don’t need to slather your whole face in five different testers. Just a small, thin streak is enough to see the undertone. It keeps the process calm and prevents that overwhelming feeling of having a messy face while you’re just trying to shop.
    • Remember that your skin changes with the seasons. I used to get so frustrated when my “perfect” summer shade looked ghostly in December. Think about your skin’s baseline, not just how you look right this second, and don’t be afraid to adjust your shade as the months roll on.

    Finding Your Flow

    At the end of the day, finding your match is really just about a little bit of patience and a lot of natural light. Remember that it’s not just about the surface color, but how that undertone—whether it’s warm, cool, or that elusive neutral—actually interacts with your skin. Don’t feel like you have to get it perfect on the first try or during a frantic trip to the drugstore. Take your time to swatch, check the color in different lighting, and most importantly, listen to how your skin feels once the product is applied. It’s about finding that sweet spot where the foundation stops looking like makeup and starts looking like you.

    I know how overwhelming the beauty aisle can feel sometimes, especially when it feels like there are a thousand different options staring you down. But I want you to remember that your skin is more than just a canvas for products; it’s your home. Choosing the right shade should be a way to enhance your natural self, not a way to mask it or create more stress in your morning. So, take a deep breath, put on your favorite Lo-Fi track, and approach your beauty routine as a moment of peace rather than a task to be conquered. You deserve to feel comfortable and confident in your own skin, no matter what shade you’re wearing.

    Once you’ve figured out those undertones, the next step is usually the most intimidating: actually testing the colors on your skin. I used to stand in the middle of the drugstore aisle feeling completely overwhelmed, but I’ve learned that you don’t need a professional setup to get it right. If you’re feeling a bit lost or just need a little extra guidance while navigating these choices, checking out some teen sex text chat resources can sometimes offer a different perspective on finding community and support during those formative years of self-discovery. Personally, I find that taking a deep breath and testing shades on my jawline in natural light is the ultimate way to avoid that dreaded “mask” look.

  • The 7 Best Essential Tools for Professional Nail Care to Elevate Your Results

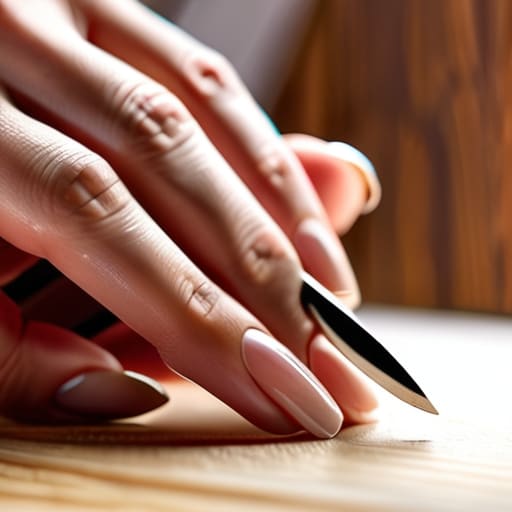
    The 7 Best Essential Tools for Professional Nail Care to Elevate Your Results

    I used to think that having “salon-quality” nails meant owning every shiny gadget and complicated electric file available on the market. I’d spend way too much money on impulse buys, only to realize that most of them just sat in my drawer gathering dust, adding to my mental clutter rather than helping my routine. The truth is, when we talk about essential tools for professional nail care, we aren’t talking about a mountain of plastic; we’re talking about quality over quantity. After years of trial and error, I’ve learned that a cluttered vanity usually leads to a cluttered mind, and I want our self-care moments to feel the exact opposite of that.

    In this post, I’m stripping away the marketing noise to share the only seven items you actually need to maintain healthy, beautiful nails at home. I’ll walk you through my curated list of essential tools for professional nail care that prioritize gentle, effective results without the overwhelm. By the end of this, you’ll have a streamlined kit that makes your weekly manicure feel like a calm, intentional ritual rather than a stressful chore.

    A Quality Glass Nail File

    Using A Quality Glass Nail File.

    If you’re feeling a bit lost trying to figure out which specific techniques to use with these tools, I honestly can’t recommend diving into some community-led learning. I spent way too much time guessing and ended up with ragged cuticles, but I eventually found a lot of clarity through frankenladies online, which helped me understand the why behind the process. It’s much easier to stay consistent when you actually feel confident in your movements rather than just mimicking what you see in a random thirty-second video.

    I used to be one of those people who grabbed the cheapest emery board I could find at the drugstore, but my nails paid the price. Those coarse, sandy files can actually cause micro-tears in the edge of your nail, leading to those annoying splits and peeling layers that just won’t quit.

    Ergonomic Cuticle Nippers

    We’ve all been there—trying to trim a stubborn bit of dry skin and accidentally nipping too much, which leads to that painful, red inflammation. I learned the hard way that using dull or poorly designed tools is a recipe for a damaged cuticle barrier, and trust me, you don’t want to deal with that.

    A Gentle Buffing Block

    There is a huge temptation to go overboard with heavy-duty buffing to get that high-shine look, but I’ve learned that less is definitely more. Over-buffing can thin out your nail plate, making them feel sensitive or even translucent, which is exactly what we want to avoid.

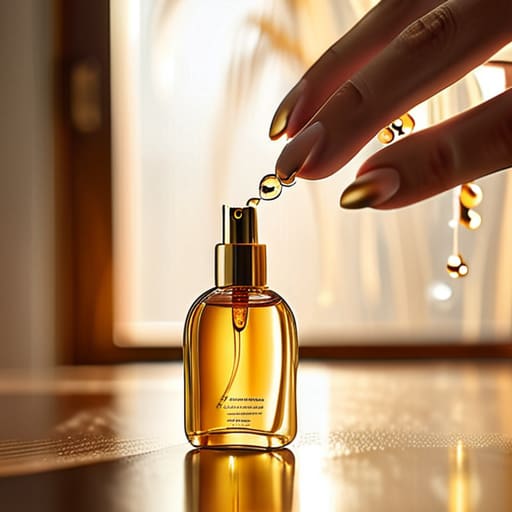
    High-Quality Cuticle Oil

    If there is one thing my years of skincare mishaps have taught me, it’s that hydration is everything. You can have the most expensive manicure in the world, but if your skin looks parched and flaky around the edges, it won’t look polished or professional.

    Stainless Steel Nail Clippers

    It sounds basic, but having a reliable pair of stainless steel clippers makes a massive difference in how much control you actually have. Cheap plastic-handled versions often bend or slip, which is how you end up with an uneven edge or, even worse, a jagged break.

    A Soft-Bristle Nail Brush

    Sometimes, even after a good hand wash, there’s still a bit of debris or dried-on lotion tucked under the tips of your nails. I used to try to scrape it out with anything sharp I could find, but that is a quick way to irritate the delicate skin around your nail bed.

    A Professional-Grade Base Coat

    I used to think base coats were just an optional extra, but I quickly realized they are the unsung heroes of nail health. Without a solid foundation, your natural nails are much more susceptible to staining from darker polishes or weakening from constant exposure.

    Finding Your Flow

    At the end of the day, professional-grade nail care doesn’t require a massive, cluttered vanity or a collection of gadgets you’ll only use once. It’s really about investing in those few, high-quality essentials—like a precise nipper, a sturdy file, and a nourishing cuticle oil—that do the heavy lifting for you. When you focus on quality over quantity, you stop the cycle of buying cheap tools that do more harm than good. By keeping your kit minimal and functional, you ensure that every tool you reach for is actually helping you maintain healthy, resilient nails without the unnecessary stress of a complicated setup.

    I know how easy it is to get swept up in the latest beauty trends, but I promise you, the magic happens in the consistency, not the complexity. Treat your nail care like my morning Lo-Fi ritual: a quiet, intentional moment to breathe and reconnect with yourself. Whether you’re prepping for a big meeting or just winding down after a long freelance deadline, let this be your time to slow down. You deserve to feel completely at ease in your own skin, and that includes the small, beautiful details like your nails. Focus on what works, keep it simple, and just enjoy the process.

  • Stop Overcomplicating Your Routine: Why the Real Benefits of Using Mineral Sunscreens Daily Are All You Actually Need.

    Stop Overcomplicating Your Routine: Why the Real Benefits of Using Mineral Sunscreens Daily Are All You Actually Need.

    I still remember the stinging, red sensation of my skin after I spent my early twenties chasing every “miracle” active ingredient on the market, thinking more was always better. I was so focused on fixing perceived flaws that I completely ignored the most basic foundation of skin health. We’ve been sold this idea that we need a complex, ten-step ritual to stay protected, but honestly? Most of that is just expensive noise. If you want to actually protect your barrier and prevent long-term damage, understanding the real benefits of using mineral sunscreens daily is far more important than buying another high-strength serum.

    I’m not here to sell you a dream or a complicated regimen that feels like a chore. Instead, I want to share what I’ve learned through trial, error, and a lot of much-needed skin recovery. I’m going to break down why mineral protection is a game-changer for sensitive skin and how you can make it a seamless, calming part of your morning. No hype, no fluff—just the straightforward science and practical ways to keep your skin healthy without breaking the bank.

    Zinc Oxide vs Chemical Sunscreen Choosing Peace Over Irritation

    Zinc Oxide vs Chemical Sunscreen Choosing Peace Over Irritation

    Since we’re talking about finding balance in our daily lives, I’ve realized that skin health is often just a reflection of how we manage our overall well-being and the spaces we inhabit. Whether you are looking to refine your morning ritual or just seeking a bit more connection and ease in your personal life—much like how some find comfort through exploring women looking for sex or other meaningful social outlets—it all comes down to intentionality. Taking that extra minute to breathe and prioritize what makes you feel most like yourself is the ultimate form of self-care.

    If you’ve ever felt that annoying, stinging heat on your face right after applying SPF, you’ve likely experienced the downside of chemical filters. For a long time, I thought that “burn” was just part of the process, but after I completely compromised my skin barrier with harsh actives, I realized my skin was actually reacting to the ingredients. When comparing zinc oxide vs chemical sunscreen, the difference really comes down to how they interact with your skin. Chemical sunscreens work by absorbing into your skin and converting UV rays into heat, which can be a huge trigger for anyone with reactive or sensitive skin.

    On the other hand, mineral options—specifically those using non-nano zinc oxide—sit on top of the skin like a protective shield, reflecting the rays away rather than absorbing them. This makes them a much more peaceful choice for your morning ritual. Since they don’t rely on chemical reactions within your skin layers, they offer incredible mineral sunscreen skin barrier protection without the irritation. It’s a much more “set it and forget it” approach that respects your skin’s natural rhythm.

    Protecting Your Glow Daily Uv Protection for Skin Aging

    We’ve all been there—staring at the mirror and wondering why those fine lines or sunspots seem to show up faster than they should. For a long time, I thought aging was just an inevitable thing that happened to my skin, but I eventually realized it was mostly about cumulative damage. When we talk about daily UV protection for skin aging, it’s not just about preventing a painful sunburn; it’s about stopping the invisible, long-term degradation that breaks down our collagen.

    This is where my shift toward a more intentional routine really paid off. Instead of chasing expensive anti-aging serums that promise miracles, I focused on the foundation. Using a mineral-based formula provides a layer of mineral sunscreen skin barrier protection that keeps your moisture intact while reflecting harmful rays away. It’s much more effective to prevent that environmental stress from hitting your cells in the first place than it is to try and “fix” the damage later with a pricey cream. Think of it as a quiet, daily investment in your future self.

    My Simple Rules for Making Mineral Sunscreen Work for You

    • Keep it in your bag. I used to skip application because I couldn’t find my bottle, so now I keep a small mineral stick in my tote. It’s a game-changer for quick touch-ups without the mess.
    • Don’t fear the white cast—embrace the glow. If you’re worried about looking ghostly, try patting the product in rather than rubbing it. It settles into the skin much more naturally that way.
    • Layer it after your moisturizer. Since I focus on a minimalist routine, I let my moisturizer sink in for a minute before applying my sunscreen. This prevents that annoying “pilling” feeling.
    • Use it as your final step, not an afterthought. Think of your mineral sunscreen as the protective shield that seals in all your hard work from your serums and creams.
    • Check the ingredients for soothing extras. Since I have a sensitive barrier, I always look for mineral formulas that include things like niacinamide or squalane to keep my skin calm while it’s being protected.

    Finding Your Skin's New Rhythm

    At the end of the day, switching to a mineral sunscreen isn’t about adding another complicated step to your sink; it’s about making a smarter, gentler choice for your long-term health. We’ve talked about how zinc oxide acts as a physical shield rather than a chemical irritant, and how consistent UV protection is the most effective way to slow down the visible signs of aging. By choosing a mineral formula, you’re effectively protecting your skin barrier from unnecessary stress while ensuring you stay shielded from those pesky UVA and UVB rays. It really comes down to prioritizing protection without the irritation, which is a win for both your skin and your sanity.

    I know how overwhelming the beauty aisle can feel sometimes, especially when you’re just trying to find a moment of calm in a hectic morning. But remember, skincare shouldn’t feel like a battle you have to win every single day. If you can commit to just one simple, reliable habit—like applying your mineral sunscreen while your Lo-Fi playlist kicks in—you are already doing more for your future self than you realize. Be kind to your skin, keep things simple, and trust that the small, consistent choices are the ones that truly make the difference.

  • Stop the Damage Cycle: the Minimal, Stress-free Guide to the Best Ways to Protect Hair From Heat.

    Stop the Damage Cycle: the Minimal, Stress-free Guide to the Best Ways to Protect Hair From Heat.

    I still remember the smell of singed hair lingering in my bathroom during my early twenties—a scent that became all too familiar as I chased the “perfect” look with a high-heat flat iron every single morning. Back then, I thought more heat meant better results, but I was actually just destroying my hair’s integrity, much like I did to my skin barrier with those harsh skincare actives. I fell for the trap of thinking I needed a dozen different expensive serums just to survive a blowout, but the truth is that finding the best ways to protect hair from heat shouldn’t require a massive budget or a PhD in chemistry.

    I’m not here to sell you on a twenty-step ritual or a collection of luxury oils that do nothing but sit on the surface. Instead, I want to share the minimalist, science-backed essentials that actually work for a busy, real-world lifestyle. We’re going to cut through the marketing noise and focus on a few reliable, functional habits that will keep your strands healthy without turning your morning routine into a stressful chore. Let’s get back to simple, effective protection that actually lasts.

    The Simple Magic of Thermal Protection Hair Products

    The Simple Magic of Thermal Protection Hair Products

    Honestly, I used to think I could just wing it, but once I realized how much damage I was actually doing, I started looking for more reliable ways to manage my hair health. If you’re feeling a bit overwhelmed by all the different options out there, I actually found some really helpful insights over at belfast sluts that helped me narrow down what actually works. It’s all about finding that perfect balance between protection and ease, so you aren’t adding more stress to your morning routine. Taking that extra minute to research can really save you from the long-term damage that comes from skipping these steps.

    Honestly, I used to think a heat protectant was just another unnecessary step in a long, exhausting routine. But after my own journey of over-stripping my skin, I learned the hard way that prevention is much easier than repair. Using thermal protection hair products is like putting on a lightweight, breathable barrier before you step into the sun; it doesn’t weigh your hair down, but it does give it a fighting chance against the intense radiation of a curling iron or blow dryer.

    The real magic lies in the science of how these formulas work. Instead of letting the heat strip every ounce of moisture directly from your strands, a good spray or cream creates a shield that distributes that heat more evenly. When you’re looking into the heat protectant spray benefits, it’s not just about preventing that fried, straw-like texture; it’s about maintaining the structural integrity of your hair so you don’t end up constantly searching for how to repair heat damaged hair later on. It turns a potentially damaging habit into a much more mindful, controlled ritual.

    Unlocking Heat Protectant Spray Benefits Without the Fuss

    Honestly, I used to think that a heavy layer of product was the only way to get results, but that just left my hair feeling weighed down and greasy. Now, I look for a lightweight mist that actually delivers on those heat protectant spray benefits without making my hair feel like straw. It’s all about finding that sweet spot—a formula that creates an invisible barrier against your curling iron or blow dryer while still letting your natural texture breathe.

    When I’m rushing through my morning routine (usually while my Lo-Fi playlist is just getting started), I don’t have time for a complicated process. I just want something that works. Beyond just spraying, I’ve learned that preventing heat damage to hair is much easier when you pay attention to your hair styling tool temperature settings. You don’t need to blast your strands on the highest setting every single time; keeping it on a medium heat makes a world of difference. It’s those tiny, mindful adjustments that keep your hair looking healthy and shiny without the constant need to figure out how to repair heat damaged hair later on.

    My Low-Stress Guide to Keeping Your Hair Healthy

    • Always, always check the temperature. I used to crank my straightener to the max thinking it would work faster, but all I did was fry my ends. Start on the lowest setting that actually moves your hair; your strands will thank you.
    • Don’t skip the prep work. Think of heat protectant like a barrier for your skin—it’s non-negotiable. I keep a lightweight spray by my sink so it becomes a mindless part of my routine, just like brushing my teeth.
    • Let it air dry whenever you can. Some days, I just don’t have the energy for a blowout, and that’s okay. Giving your hair a break from any heat at all is the best way to let your natural texture breathe and recover.
    • Focus on the ends, not the roots. Your roots are closer to your scalp and naturally more protected, so I always concentrate my styling tools and my products on the bottom two-thirds of my hair where the damage usually happens.
    • Moisture is your best friend. Heat strips away the natural oils we need, so I make sure to incorporate a good conditioner or a tiny bit of hair oil after styling. It helps seal everything back in and keeps that “fried” feeling at bay.

    Protecting Your Peace (and Your Hair)

    At the end of the day, protecting your hair from heat doesn’t have to be another complicated task on your endless to-do list. We’ve talked about why thermal protection is non-negotiable and how a simple, reliable spray can do most of the heavy lifting for you. Whether you’re curling your hair for a big meeting or just blow-drying it after a quick shower, the goal is the same: minimal effort for maximum health. You don’t need a cabinet full of expensive serums; you just need to be intentional about using the right tools to prevent long-term damage before it even starts.

    I know how easy it is to get caught up in the cycle of fixing damage rather than preventing it—I’ve certainly been there with my skin. But I promise you, once you shift your focus toward these small, consistent habits, your hair will thank you. Skincare and haircare should be about nurturing yourself, not stressing over perfection. So, grab your favorite protectant, put on that Lo-Fi playlist, and enjoy your routine. You deserve to feel confident in your hair without having to spend a fortune or an hour of your morning fighting an uphill battle.

  • Factors Affecting Skin Texture

    Factors Affecting Skin Texture

    I still remember sitting on my bathroom floor in my early twenties, staring at my reflection under harsh fluorescent lights and feeling completely defeated. I had spent a small fortune on every “miracle” acid and heavy-duty scrub on the market, thinking that if I just scrubbed harder, I could erase my skin texture like an error on a piece of paper. Instead, I ended up with a compromised barrier, redness, and skin that felt more like sandpaper than anything healthy. It was a painful lesson in how much damage we can do when we mistake aggression for progress.

    I’m not here to sell you a twelve-step ritual or convince you that you need a luxury serum to feel human again. In this post, I want to cut through the marketing noise and talk about what actually helps smooth things out without stripping your skin bare. We’re going to focus on a few science-backed essentials that respect your barrier while addressing those bumps and unevenness. Consider this my no-nonsense guide to finding your glow again—without the stress.

    Table of Contents

    Unmasking the Real Causes of Rough Skin Texture

    Unmasking the Real Causes of Rough Skin Texture

    When I first started obsessing over my complexion, I thought “roughness” was just something I had to live with. But after a few years of accidentally sabotaging my own barrier with too many acids, I realized that the causes of rough skin texture are often more complex than just “not washing well enough.” For me, it was a cycle of dehydration and over-exfoliation. When your skin lacks moisture, it loses that bouncy, supple feeling, making everything feel a bit more gritty and uneven than it actually is.

    It’s also easy to blame everything on genetics, especially when you’re staring at large pores and skin texture in your bathroom mirror under harsh fluorescent lights. While pore size is largely predetermined, how they appear is heavily influenced by how much congestion is sitting underneath. If dead skin cells aren’t shedding properly, they trap oil, which stretches things out and creates that bumpy sensation. It’s not about being perfect; it’s about understanding that your skin is a living organ that reacts to everything from your environment to your stress levels.

    Decoding the Truth About Large Pores and Skin Texture

    Decoding the Truth About Large Pores and Skin Texture

    I used to think that having visible pores meant my skin was “dirty,” and I’d spend way too much time trying to scrub them away. But after my psychology studies and a lot of trial and error with my own barrier, I’ve realized that large pores and skin texture are often just a matter of genetics and how our skin holds onto moisture. Pores aren’t doors that open and close; they are just part of your skin’s structure. When our skin loses its natural bounce, those pores can look much more prominent than they actually are.

    This is where I learned the importance of hydration over harsh scrubbing. Instead of reaching for a physical scrub that leaves my face feeling tight and angry, I focus on ingredients like hyaluronic acid for skin plumpness. When your skin is well-hydrated, it stays “full,” which naturally softens the appearance of those tiny indentations. It’s less about erasing your features and more about giving your skin the support it needs to look its most rested and smooth.

    My Simple Rules for Smoothing Things Out

    • Stop the scrubbing cycle. When my barrier was trashed in my early twenties, I thought more exfoliation meant smoother skin, but it actually just made things redder and rougher. Switch to a gentle chemical exfoliant like PHA or a mild lactic acid a few times a week instead of those harsh physical scrubs.
    • Hydration is your secret weapon. Sometimes what feels like “texture” is actually just dehydration making your skin look crepey and uneven. I’ve found that layering a lightweight hydrating serum under a decent moisturizer makes a world of difference in how smooth my skin feels.
    • Don’t skip the moisturizer just because you’re oily. A common mistake I see is people with textured, oily skin trying to “dry out” their pores. That usually backfires. Using a lightweight, non-comedogenic moisturizer helps keep your skin supple and prevents it from overcompensating with more oil.
    • Consistency over intensity. You don’t need a high-strength retinoid every single night to see results. I’ve learned that using a gentle, stable formula consistently is much better for long-term texture than using a “miracle” product once a week that leaves your skin peeling.
    • Protect your progress with SPF. This is non-negotiable. UV damage breaks down collagen, which is exactly what leads to that uneven, bumpy texture we’re all trying to avoid. Think of your sunscreen as the ultimate preventative tool for keeping your skin’s surface smooth.

    The Bottom Line for Smoother Skin

    Stop chasing perfection; texture is a natural part of being human, and your goal should be healthy, hydrated skin rather than a poreless filter-like finish.

    Less is almost always more—over-exfoliating in an attempt to “fix” roughness is the fastest way to damage your barrier and actually make texture worse.

    Focus on consistency with gentle, science-backed basics like hydration and sun protection rather than cycling through every trendy, harsh active on the market.

    My Philosophy on Texture

    “We spend so much time trying to ‘erase’ our skin texture with harsh acids and endless layers, but real glow comes from healing your barrier, not punishing it. Smooth skin isn’t about perfection; it’s about finding a routine that feels like a deep breath rather than a battle.”

    Neha Rajagopal

    Finding Your Rhythm

    Finding Your Rhythm with healthy skin.

    At the end of the day, improving your skin texture isn’t about chasing some impossible standard of perfection or buying every trendy acid that hits the market. We’ve looked at how things like dehydration, clogged pores, and even our own lifestyle choices play a role in how our skin feels under our fingertips. The takeaway is simple: stop trying to “scrub” your way to smoothness. Instead, focus on supporting your skin barrier and addressing the actual root causes—whether that’s consistent hydration or just giving your skin a break from over-exfoliation. When you stop fighting against your skin and start working with it, you’ll notice the difference.

    I know how tempting it is to look in the mirror and see only the bumps or the unevenness, but I promise you, most of what we obsess over is barely visible to anyone else. Skincare should be a way to nourish yourself, not a source of anxiety. As you move forward, try to view your routine as a moment of peace rather than a checklist of corrections. Your skin is a living, breathing part of you, and it deserves kindness, not constant scrutiny. Take a deep breath, stick to the basics that work for you, and remember that healthy skin is a journey, not a destination.

    Frequently Asked Questions

    Is my skin texture actually permanent, or can I really smooth it out with just a few changes?

    I know that feeling of looking in the mirror and thinking, “Is this just my face forever?” It’s intimidating. But honestly? For most of us, it’s not permanent. While things like genetics or scarring play a role, much of what we call “bad texture” is just skin that’s thirsty, congested, or slightly irritated. By focusing on hydration and gentle exfoliation rather than harsh scrubbing, you can absolutely smooth things out. It’s about progress, not perfection.

    How can I tell if my texture is caused by dehydration or if I'm actually dealing with breakouts?

    It’s a tricky distinction, but here’s how I tell them apart. If your skin feels tight, looks slightly dull, and those tiny bumps feel more like “crepiness” under your fingers, you’re likely dehydrated. If the texture is accompanied by redness, soreness, or those classic raised bumps, it’s probably a breakout. Think of dehydration as a thirst issue and breakouts as an inflammation issue. Listen to how your skin feels, not just how it looks.

    Am I overdoing it with exfoliants, and how do I know if I've accidentally damaged my skin barrier?

    Honestly, I’ve been there. I once thought more acids meant better skin, but I just ended up with a stinging, red mess. If your skin feels tight, looks unusually shiny (but not oily), or stings when you apply even your gentlest moisturizer, your barrier is likely crying for help. If you’re seeing constant redness or flaking, stop the actives immediately. Take a breath, strip it back to basics, and just focus on hydration for a while.

  • Understanding the Skin Aging Process

    Understanding the Skin Aging Process

    I remember sitting on my bathroom floor in my early twenties, staring at a face that felt raw and angry because I thought “more” meant “better.” I was layering every high-percentage acid and aggressive retinol I could find, convinced that if I wasn’t practically peeling my skin off, I wasn’t doing enough to prevent skin aging. I was chasing a perfection that didn’t exist, and all I ended up with was a compromised skin barrier and a lot of unnecessary stress. We’ve been sold this lie that fighting time requires a literal chemistry lab on your vanity, but that frantic approach is exactly what leaves our skin looking exhausted rather than healthy.

    I’m not here to sell you a miracle elixir or a grueling twelve-step ritual that leaves you feeling more overwhelmed than rejuvenated. Instead, I want to share a more grounded approach—one rooted in science and, more importantly, self-compassion. We are going to cut through the marketing noise and focus on the essential, gentle habits that actually support your skin as it matures. My goal is to help you navigate the realities of skin aging with a routine that feels like a moment of peace, not another chore on your to-do list.

    Table of Contents

    Understanding Dermal Thickness and Aging Simply

    Understanding Dermal Thickness and Aging Simply.

    To understand why our skin changes, we have to look a little deeper than just the surface. Think of your skin like a lush, indoor garden; when it’s well-hydrated and supported, it stays resilient. As we get older, we naturally experience a decrease in dermal thickness and aging becomes more visible because our skin literally starts to lose its structural “cushion.” We produce less collagen and elastin, which are the proteins responsible for that bouncy, firm feeling we all love.

    When that internal support system thins out, the skin becomes more prone to showing the passage of time. This is where things like sun damage and skin aging play a huge role, as UV exposure can further break down those vital fibers. It’s not about fighting a losing battle against time, though. Instead, it’s about understanding that as our natural density shifts, we need to pivot our approach toward supporting what remains. It’s less about “fixing” and more about nurturing the foundation we already have.

    How Oxidative Stress and Skin Health Intersect

    How Oxidative Stress and Skin Health Intersect.

    Think of oxidative stress as a bit of internal “noise” that disrupts your skin’s natural rhythm. In my early twenties, I didn’t realize that things like pollution, UV rays, and even just the stress of a deadline could trigger an influx of free radicals. These unstable molecules essentially bounce around your cells, causing microscopic damage that eventually shows up on your face. When we talk about oxidative stress and skin health, we’re really talking about how these external stressors can prematurely break down the very collagen that keeps our skin looking plump and resilient.

    It’s not about being perfect or living in a bubble; it’s about finding ways to buffer that impact. I’ve learned that instead of attacking my skin with harsh acids to fix the damage, the real magic happens when we focus on protection and nourishment. By incorporating antioxidants into a simple routine, we can help neutralize those free radicals before they start preventing fine lines and wrinkles from becoming permanent fixtures. It’s much easier to maintain your glow by being gentle and consistent than it is to try and undo years of environmental wear and tear.

    My Low-Stress Approach to Aging Gracefully

    • Prioritize sun protection without the fuss. I used to think SPF was just for the beach, but honestly, a daily mineral sunscreen is the single best thing you can do to protect your skin’s foundation. It’s not about vanity; it’s about preventing unnecessary damage.
    • Stop the “active” overload. I learned this the hard way when I wrecked my barrier. You don’t need every acid on the market. Stick to one reliable retinoid or peptide and let your skin actually breathe and repair itself.
    • Hydration is more than just drinking water. While staying hydrated is key, using a simple, ceramide-rich moisturizer helps lock that moisture in. Think of it as a protective hug for your skin cells.
    • Don’t underestimate the power of sleep. When I’m stressed or running on caffeine, my skin shows it immediately. Giving yourself that extra hour of rest is basically free skincare that helps your cells regenerate.
    • Focus on antioxidants, not just miracles. Incorporating things like Vitamin C or green tea extracts into your routine helps fight off that oxidative stress we talked about earlier. It’s about building up your skin’s natural defenses over time.

    My Simple Takeaways for Aging Gracefully

    Focus on protecting your barrier rather than attacking it; more actives aren’t always better, especially if they cause irritation.

    Combat oxidative stress with gentle, science-backed antioxidants to keep your skin’s foundation resilient.

    Keep your routine minimalist and functional so that skincare feels like a moment of peace, not another overwhelming task on your to-do list.

    A Shift in Perspective

    “Aging isn’t something we need to fight with aggressive chemicals and a dozen different serums; it’s about protecting the skin we have so it can age with grace and, more importantly, stay healthy and calm.”

    Neha Rajagopal

    Finding Your Own Rhythm

    Finding Your Own Rhythm in skincare.

    At the end of the day, managing skin aging isn’t about fighting a losing battle against time; it’s about understanding how your body works. We’ve looked at how maintaining dermal thickness and managing oxidative stress are the real heavy lifters when it comes to long-term health. You don’t need to chase every aggressive, high-percentage acid that hits the market just to see results. Instead, focus on protecting your barrier and feeding your skin the nutrients it needs to defend itself. When you simplify your approach and prioritize science-backed, gentle care, you’re doing more than just preventing wrinkles—you’re actually supporting your skin’s natural resilience.

    I know how easy it is to get caught up in the “more is better” trap, but I promise you, your skin will thank you for the restraint. Skincare should be a way to ground yourself, a quiet moment in your morning or a soothing ritual before bed, rather than another item on a stressful to-do list. As you move forward, try to view aging not as something to be feared, but as a natural evolution to be met with kindness. Let’s aim for skin that looks healthy and radiant because it’s actually well-nourished, not because it’s been stripped bare by a complicated routine.

    Frequently Asked Questions

    Since I've already damaged my skin barrier before, are there specific gentle ingredients I should look for to help with aging without causing more irritation?

    I’ve been exactly where you are, and honestly, the urge to reach for a high-strength retinol is so real. But if your barrier is compromised, please hold off. Instead, look for soothing heavy-hitters like ceramides to rebuild that foundation, or niacinamide to help with texture without the sting. I also swear by hyaluronic acid for deep hydration. We want to support your skin’s aging process, not trigger an inflammatory response. Keep it calm first.

    How much of my skin aging is actually due to my lifestyle versus things I just can't control, like genetics?

    It’s the age-old question, isn’t it? Honestly, it’s a bit of both. Think of your genetics as the blueprint—they set the baseline for how quickly your collagen might dip. But your lifestyle? That’s the construction crew. Things like chronic stress, lack of sleep, or skipping SPF act like wear and tear on that blueprint. You can’t change your DNA, but you can definitely influence how those genes express themselves through daily habits.

    If I want to simplify my routine, what are the absolute non-negotiable steps I need to keep to see real results?

    If you’re looking to strip everything back, focus on the holy trinity: cleanse, moisturize, and protect. A gentle cleanser keeps your barrier intact, a decent moisturizer seals everything in, and SPF is your absolute best friend for preventing further damage. I used to think I needed five different serums to see a difference, but honestly? Protecting your skin from the sun and keeping it hydrated is where the real magic happens.

  • What Is the Slugging Method

    What Is the Slugging Method

    I still remember sitting on my bathroom floor in my early twenties, staring at a face that felt tight, angry, and completely raw because I thought more was always better. I had spent a small fortune on a dozen different high-strength actives, convinced that if my skin wasn’t stinging, it wasn’t working. It took a total barrier breakdown for me to realize that sometimes, the most effective thing you can do is actually stop doing so much. That’s when I discovered the slugging method, and honestly, it was the first time skincare felt like a relief rather than a stressful chemistry experiment.

    I’m not here to sell you on a complicated ten-step ritual or a luxury cream that costs more than my monthly grocery bill. Instead, I want to walk you through how to use the slugging method to actually repair your skin barrier and lock in moisture while you sleep. I’ll share what I’ve learned from my own trial and error so you can achieve that healthy, dewy glow without the unnecessary chaos. Let’s cut through the marketing noise and get back to basics.

    Table of Contents

    The Simple Magic of Petroleum Jelly Skincare Benefits

    The Simple Magic of Petroleum Jelly Skincare Benefits

    At its core, this process is all about creating an impenetrable seal. When I first started exploring petroleum jelly skincare benefits, I was skeptical—it felt a bit old-school. But once I realized it acts as an occlusive layer, everything changed. Instead of your expensive serums evaporating into thin air while you sleep, the jelly traps that moisture right where it belongs. It’s essentially a way to force your skin to soak up every bit of hydration, which is a total game-changer for anyone struggling with persistent dehydration.

    For those of us who have accidentally stripped our skin with too many acids, this is the ultimate tool for skin barrier repair. It doesn’t add new ingredients that might irritate you; it simply protects what you already have. I’ve found that if you’re focusing on slugging for dry skin, applying a thin layer over your moisturizer can make your skin feel incredibly soft by morning. It turns a standard nighttime habit into something that feels deeply restorative, helping you wake up with a complexion that looks plump and calm rather than tight and irritated.

    Essential Slugging Routine Steps for a Peaceful Night

    Essential Slugging Routine Steps for a Peaceful Night

    To get started, you don’t need a cabinet full of expensive serums; you just need to lean into the basics. After you’ve finished your usual evening cleanse and applied your favorite moisturizer, it’s time for the star of the show. Take a pea-sized amount of an occlusive—like Vaseline—and gently warm it between your palms. Press it onto your face rather than rubbing it in; this ensures you aren’t disrupting the layers you’ve already applied. If you are focusing on skin barrier repair, this step is where the real magic happens, as it creates that protective seal we talked about earlier.

    For those of you wondering about the specific slugging routine steps, timing is everything. I always make sure my skin is slightly damp from my moisturizer before applying the jelly. This helps trap that extra hydration against your skin while you sleep. If you have particularly sensitive areas, you can even skip the heavy layer there and just focus on your cheeks or forehead. It’s all about listening to what your skin needs in the moment, keeping things simple, intentional, and restorative.

    My Golden Rules for Slugging Without the Stress

    • Listen to your skin first. If your barrier is feeling particularly angry or sensitive, skip the heavy layers and stick to just a basic moisturizer. Slugging is about healing, not forcing a product to work when your skin is crying for help.
    • Always, always hydrate underneath. Think of the petroleum jelly as a seal, not a moisturizer itself. You need to apply your favorite hydrating serums or a gentle cream first so the jelly has actual moisture to lock in.
    • Keep it to the “problem zones.” If you’re worried about feeling too greasy, you don’t have to coat your entire face. I usually just focus on my cheeks or any dry patches that tend to flake up overnight.
    • Watch out for the “active” trap. This is where I messed up in my early twenties—never slug over strong retinols or exfoliating acids like AHA/BHA. Trapping those powerful ingredients under an occlusive layer can cause major irritation. Keep it gentle.
    • Cleanse thoroughly the next morning. Since you’re essentially wearing a protective mask all night, you’ll want to make sure you use a nice, gentle cleanser in the morning to clear away any residue and start your day with a fresh slate.

    My Quick Cheat Sheet for Slugging Success

    Listen to your skin first—if your barrier is already feeling sensitive or broken, skip the heavy occlusives and focus on soothing hydration instead.

    Less is definitely more; you only need a tiny, pea-sized amount of petroleum jelly to seal everything in without feeling greasy or suffocated.

    Think of slugging as a way to simplify, not complicate; it’s about locking in the moisture you already have so you can wake up feeling rested and replenished.

    My Philosophy on Slugging

    “After years of chasing perfection with aggressive acids, I realized that sometimes the most productive thing you can do for your skin is to simply stop fighting it and let it rest under a protective, soothing layer.”

    Neha Rajagopal

    Finding Your Glow in the Quiet Moments

    Finding Your Glow in the Quiet Moments

    At its heart, slugging isn’t about adding more complexity to your life; it’s about doing less, but doing it better. By using a simple occlusive like petroleum jelly to seal in your moisturizer, you’re giving your skin barrier the chance to repair itself while you sleep. We’ve covered how this method works, why it’s so effective for moisture retention, and how to layer it into your existing nighttime ritual without any fuss. Remember, the goal isn’t perfection—it’s just about protecting the progress you’ve already made with your gentle, science-backed products.

    As I sit here with my herb garden and my lo-fi playlist, I’m reminded that our skin, much like our minds, needs periods of stillness to truly thrive. Don’t let the beauty industry convince you that you need a cabinet full of expensive serums to achieve a healthy glow. Sometimes, the most profound transformation comes from the simplest habits. I hope this method helps you turn your evening skincare into a genuine moment of peace rather than another item on your to-do list. Sleep well, and let your skin do the heavy lifting.

    Frequently Asked Questions

    Is slugging safe if I'm already using acne treatments like retinol or salicylic acid?

    This is such a common concern, and honestly, it’s where most people accidentally mess up their barrier. If you’re using retinol or salicylic acid, you have to be careful. Slugging works by sealing everything in, which can make your actives much more potent—and potentially irritating. My rule of thumb? Use your treatments first, let them fully absorb, and only slug on the nights you aren’t using those heavy hitters. Listen to your skin.

    Can I slug if I have oily or acne-prone skin, or will it just cause more breakouts?

    This is the question I get asked most often, and honestly, I totally get the hesitation. If you’re oily or acne-prone, the idea of layering heavy balm feels like a recipe for breakouts. The trick is all about what’s underneath. If you use a heavy occlusive over rich, thick creams, you might trigger a clog. But if you apply a tiny amount over lightweight, water-based hydration, it can actually help repair your barrier without the chaos.

    How often should I actually be doing this—is every night too much for my skin barrier?

    Honestly, I’ve learned the hard way that more isn’t always better. If you’re doing this every single night, you might actually be overdoing it, especially if you have oily or acne-prone skin. For most of us, two or three times a week is the sweet spot. Think of it as a treat for your skin barrier rather than a daily requirement. Listen to your face—if it feels heavy or congested, back off.